
I recently started working on improving my knowledge of managing various AWS services. I plan to write a series of posts on those as additional exercise to organize thoughts and ideas. First is IAM users and their policies. This post describes my way of managing access to S3 bucket using policies.
I will try to keep a similar structure for this posts to make clear what is the required outcome and how to achieve it.
The task
- Create an s3 bucket
- Add policy that allows external company to access this bucket (and only this one)
- Create a user in AWS Identity and Access Management (IAM) with the role of read-only auditor
The solution
One of the tools that is helpful in testing the implemented solution is the Amazon CLI client that will allow us to run some commands against the created bucket.
Ok, let’s log in as a user that has admin rights to Amazon Services and start with creating a new S3 bucket.
First, go to the S3 section and click ‘Create bucket’
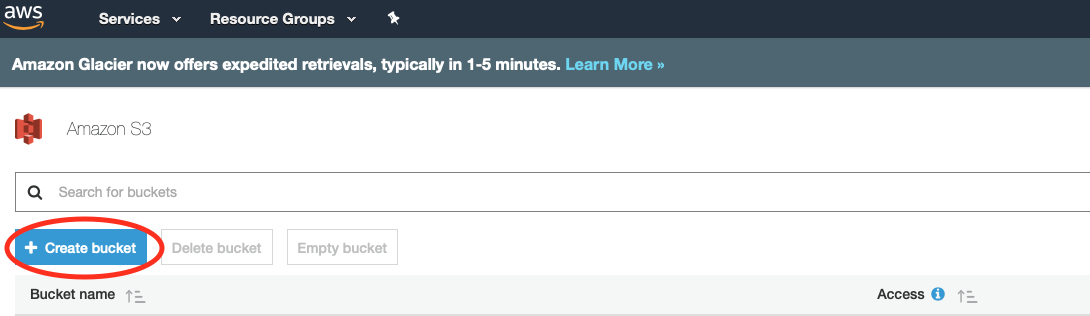
Enter the name, optional tags, etc. and ensure that public-read is disabled.
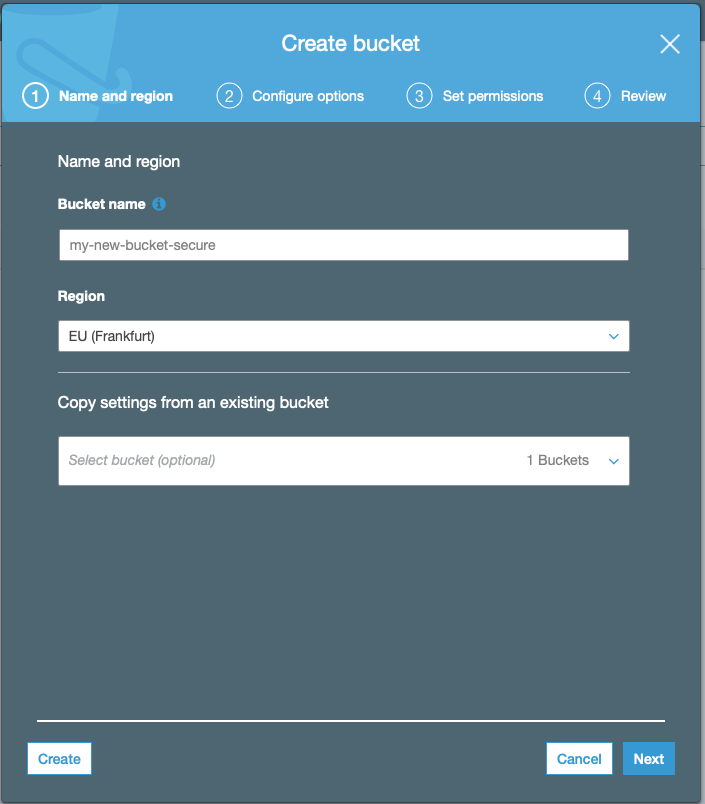
Let’s use my-test-bucket-secure as an example name for this exercise.
We can now move to the IAM section of AWS services. This service allows to handle authentication and authorization of users. We can set a very specific rights where we can only allow specific access type to very specific AWS resources.
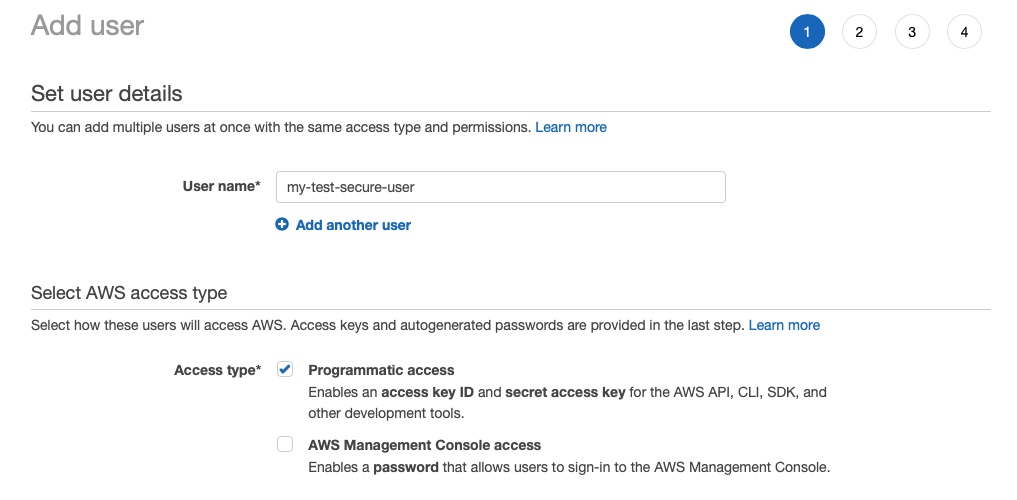
Let’s select IAM from the AWS services list, then in the left hand panel select Users.
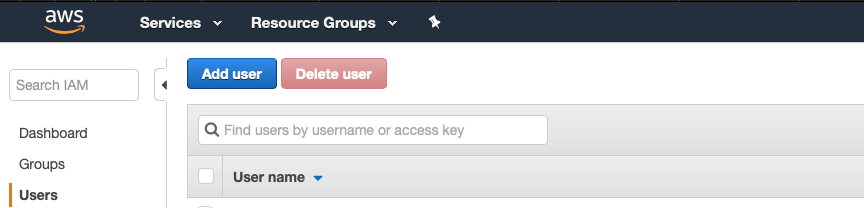
Click on Add user and select their name. We’ll use my-test-secure-user for this example.
For access type let’s select Programmatic access. This will create an access key to be used for API and CLI without the need for accessing the AWS Management Console with password.
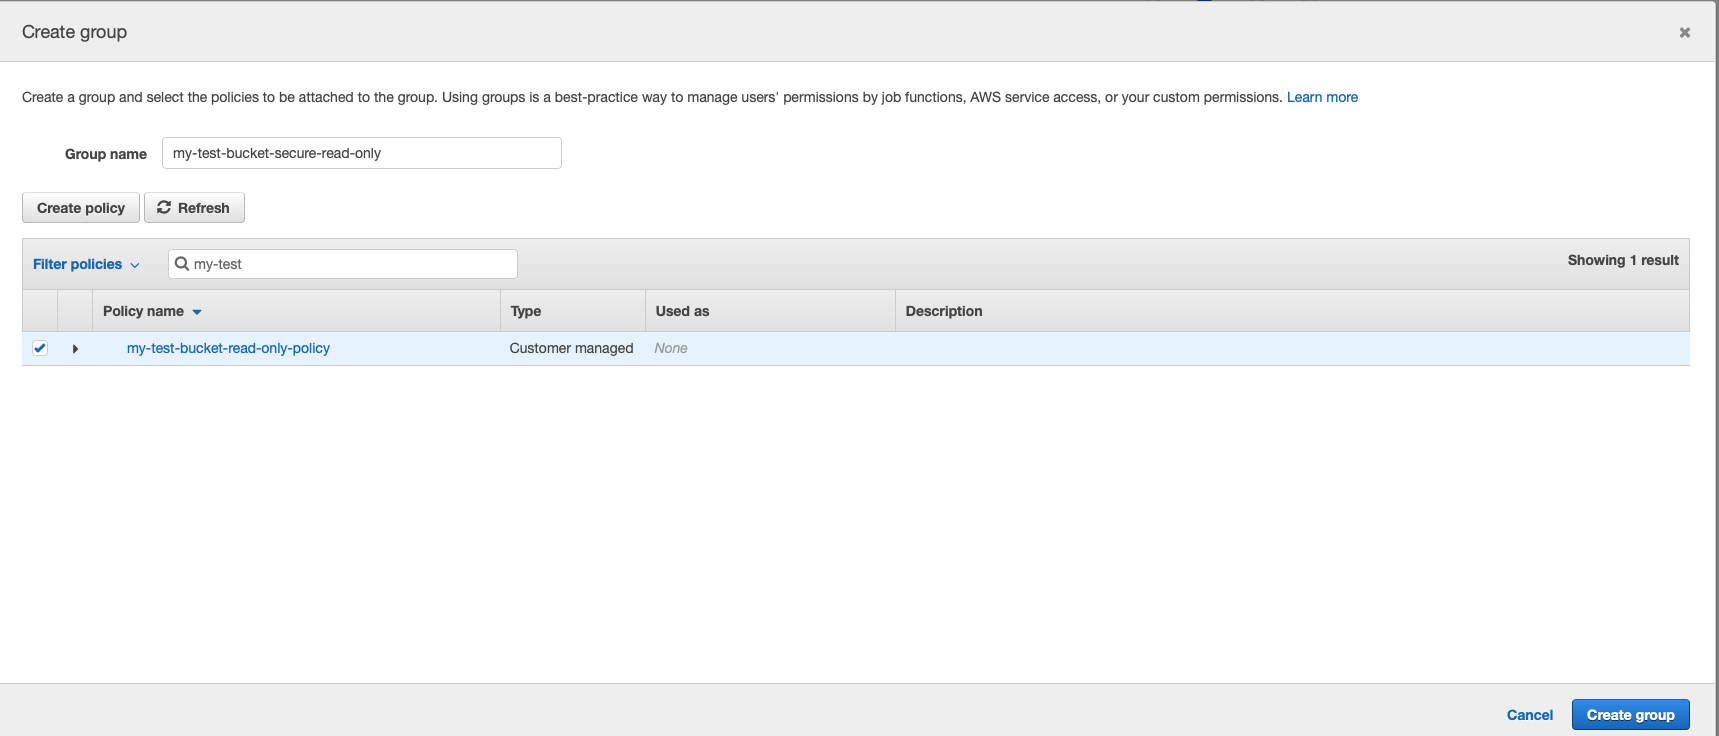
In the next step, we can assign user to a group. Groups are useful for creating a set of permissions that can be then attached to various users (and also mixed and matched). This makes managing multiple users easier.
Let’s create a new group and give it a descriptive name that will later be clear what is this group actually used for.
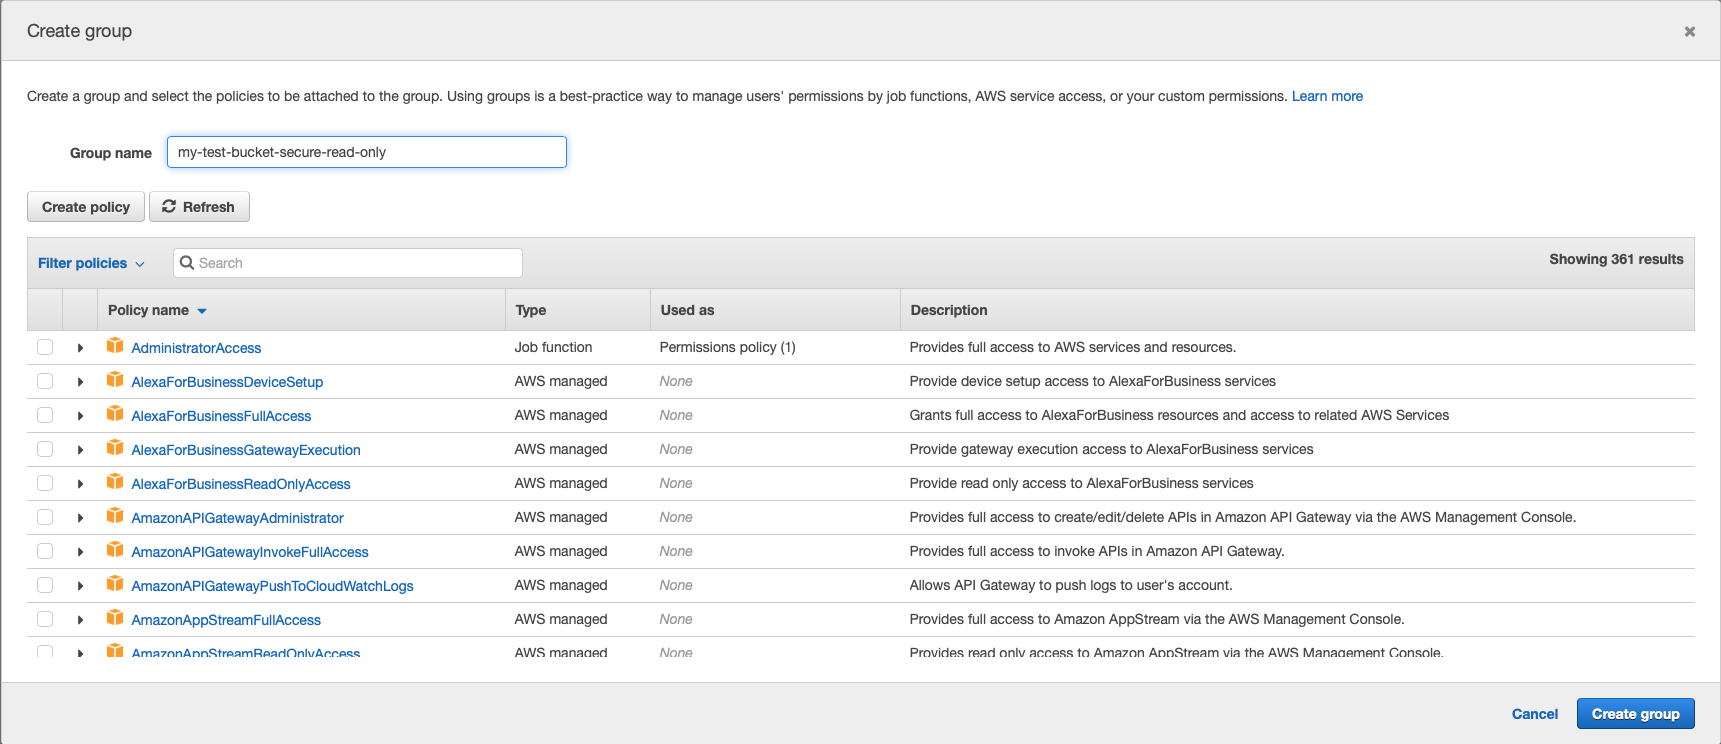
We can select either existing policy from a long list of what AWS already offers us or create a new one. Policy is a set of rules what users can do and for what resources.
We’ll create a new specific one for our case. Let’s click Create policy button.
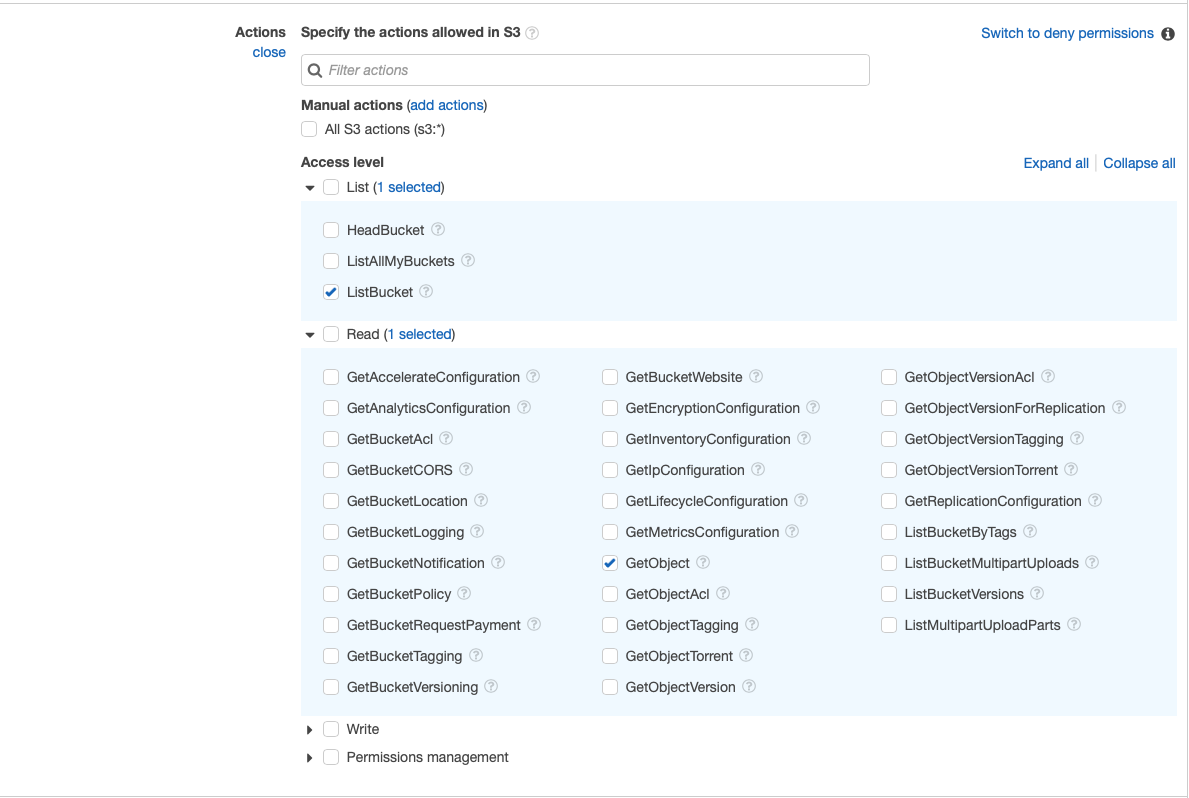
We’re taken to yet another screen where we can either use clickable wizard-like interface to create our policy or if we know JSON syntax (which is also quite clear) we can select this option. For our example let’s use a wizard and then we’ll have a look at the JSON generated by AWS for this policy.
As a service, select S3 as this is what our policy is managing and for actions we’ll select ListBucket (that allows seeing the list of files there) and GetObject which allows reading and downloading objects from a bucket (clicking a small question mark next to the action gives some more description about its function).
Then we need to select resources that we apply those actions to. For bucket, let’s select the one that we created in the first step: my-test-bucket-secure which in full syntax will give us: arn:aws:s3:::my-test-bucket-secure. For the objects, let’s just give access to all in this bucket, but we could also limit those to only specific ones:
again select bucket my-test-bucket-secure and object name Any. This will create the following ARN: `arn:aws:s3:::my-test-bucket-secure/*
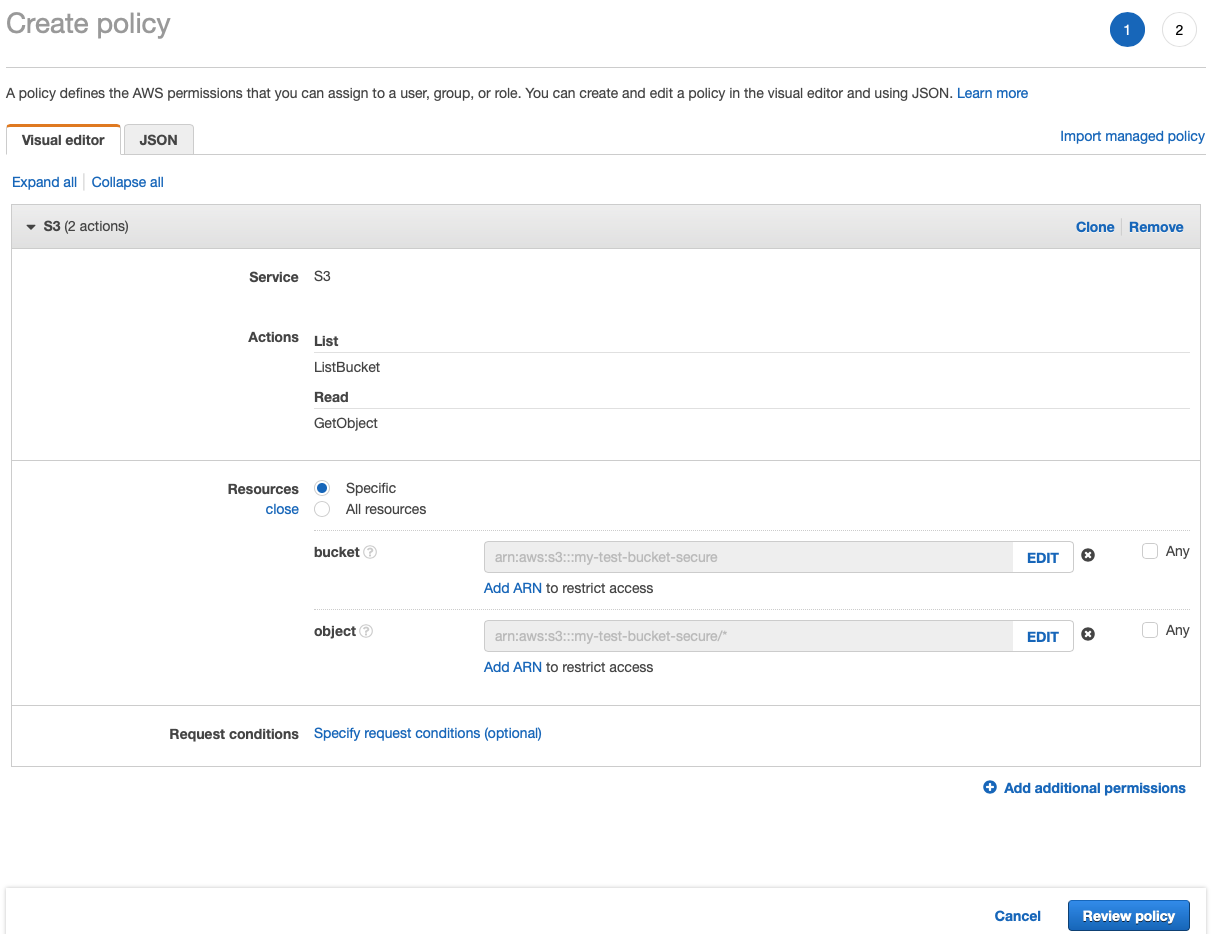
and we have our policy ready for review.
We can also have a look at the JSON syntax that was generated for us:
{
    "Version": "2012-10-17",
    "Statement": [
        {
            "Sid": "VisualEditor0",
            "Effect": "Allow",
            "Action": [
                "s3:GetObject",
                "s3:ListBucket"
            ],
            "Resource": [
                "arn:aws:s3:::my-test-bucket-secure",
                "arn:aws:s3:::my-test-bucket-secure/*"
            ]
        }
    ]
}
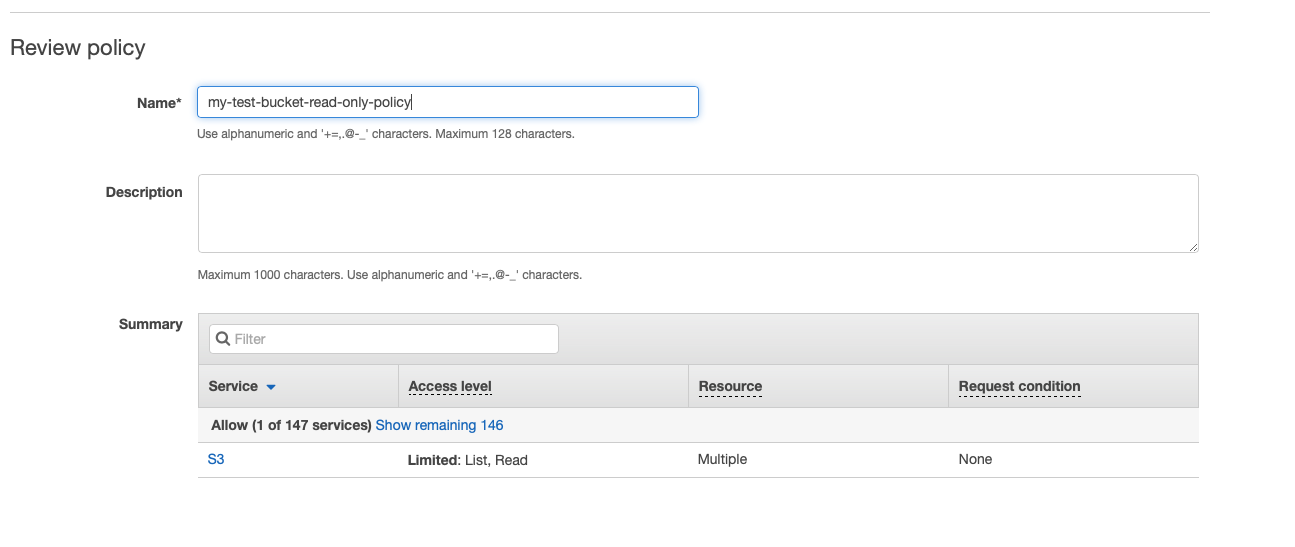
During the review process we can name the policy. Once it is ready, we can add the created policy to the group that we were creating.
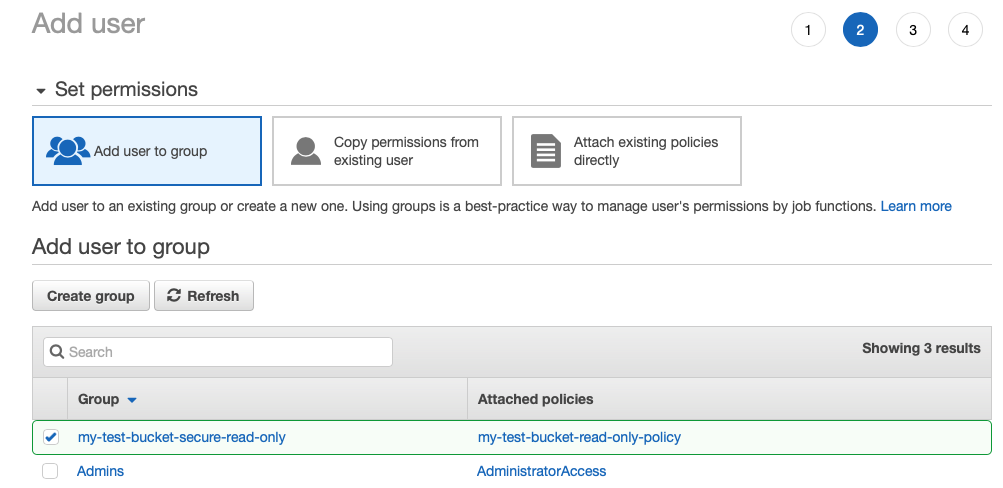
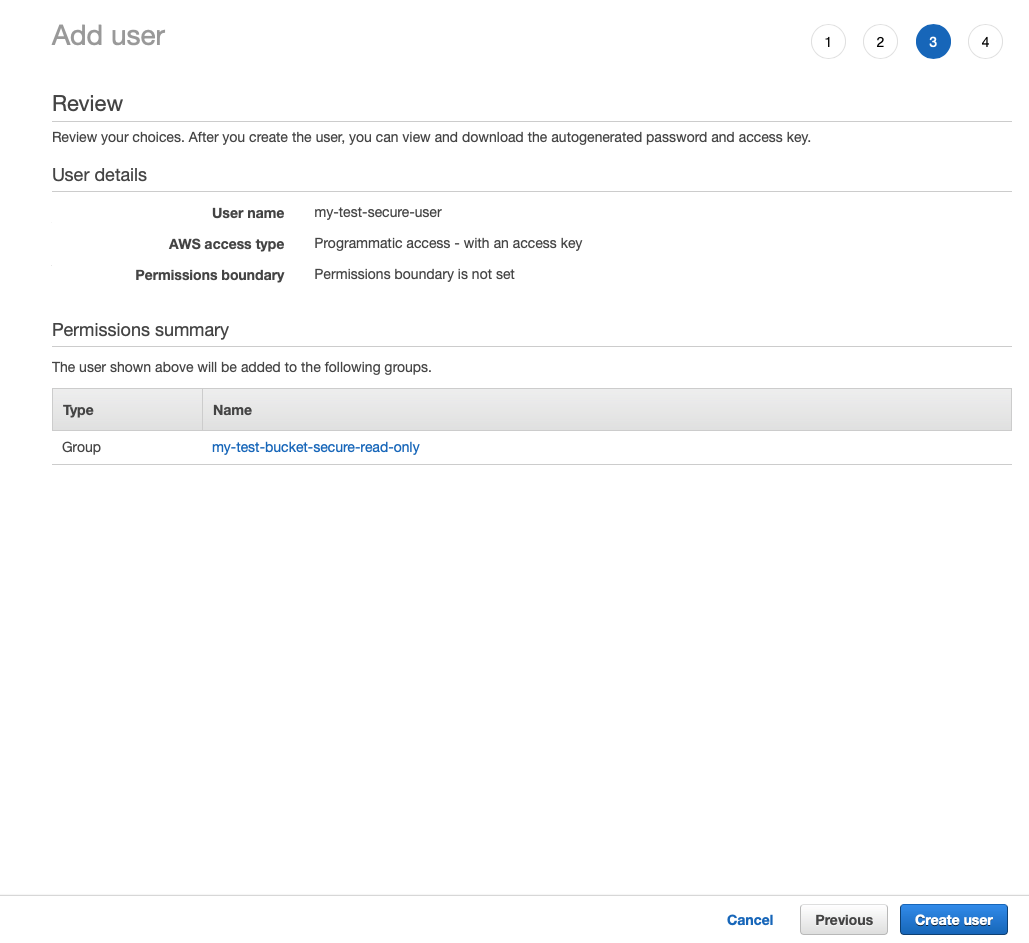
And finally attach group to the IAM role that we went with. We can then review the user that we were creating and if everything is fine, we can click Create user.
This will give us a chance to see and download the key that can be shared with whomever we want to give our access to.
Testing
We can now do some quick testing with our keys that were created and AWS CLI. To add keys to configuration we can run:
aws configure
and enter the information that we got in the last step of our setup (AWS Access Key ID and AWS Secret Access Key).
We can then query our resources:
aws s3 ls s3://my-test-bucket-secure
to get a list of files uploaded to the S3 bucket. We can then copy something that we uploaded there, e.g.:
aws s3 cp "s3://my-test-bucket-secure/some-cool-image.png" ~/Downloads/some-cool-image-v1.png
Conclusion
This is how giving access through IAM looks like. It is pretty straightforward and Amazon gives us a lot of wizards to make it even simpler. The only difficulty might be a number of options and services we need to search through when getting to what we need.